
Hello again my crafty folks!
Although, The Very Hungry Caterpillar is a well-known and popular children's book they don't have a lot of already made party supplies. I searched around online and found a few things here and there but none that I was super impressed by and especially not at the prices. For this reason, I decided to make most of the party decorations myself.
First, the invitations.
When I first began brainstorming ideas for invitations I envisioned making a small booklet like the VHC book that summarized Makena's first year of life. Months before her party I began teaching myself how to design using Photoshop Elements and let me tell you it was no easy task. I consider myself crafty, like paper, glue & scissors type crafty, not computer programs type crafty (if that makes any sense to you.) After many many hours, days, weeks of playing around on Photoshop I finally managed to design exactly what I wanted. I was so proud of myself and couldn't wait to take my file to the local print shop to have them printed. Unfortunately, my dreams were quickly shattered. I found out that each invitation was going to cost me around $4-$6 to print depending on the type of paper I chose. That meant $160-$240 dollars just on 50 invitations!! I briefly tried to justify the cost but knew there was no way I was going to pay that much on just invitations alone, so I quickly came up with a plan b. I googled VHC invitations I found many images with a caterpillar made out of circles. I wasn't overly excited with any of the ones I found so I thought why not combine my original idea with the caterpillar styled invite? Ta-da and here you have it folks...
 |
| Folded invitation |
 |
| Full invitation unfolded |
 |
| 1st page |
 |
| Pages 3 & 4 |
 |
| Back side |

The invitations fit perfectly in an A6 envelope that I purchased from Paper Source in the color Beet. I also found The Year of the Dragon mailing stamps (Makena was born during the year of the dragon) on the USPS website and had to have them. After all, it's all about the details right?
Welcome Sign
All that time I spent on Photoshop Elements (PSE) for the invitations paid off because I was able to design several paper crafts for the party. One of the many things I designed was this welcome sign. I used the same VHC images I found online and added text. The sign measures 10x10 inches and it hung perfectly on the front door.
Supplies:
-12x12 colored cardstock paper
-Paper glue
-Typed or handwritten message for sign
-Ribbon
-Hole punch

No Sew Fabric Pennant Banner
Ok. I do not sew. Well I have good intentions to sew. I got a sewing machine for Mother's Day. It's still in its box.
I was happy to find many great no sew tutorials on good ol' Pinterest. I remember seeing seeing Beverly Fabrics sold VHC fabric. I purchased a 1/2 yard of each design and that was plenty enough to make the banner. Next, I made a triangle template out of recycled cardboard that measured 12 inches on the long sides and 8 inches on the top edge. I used my template to trace triangles onto my fabric and then cut the triangles using pinking shears also known as zig zag scissors (you can also use straight scissors for this too!) Once I had all my triangles cut I measured out 80 inches of red polka dot ribbon and hot glued the triangles to it. That's it! I can't tell you how easy & cheap this banner was to make and I loved the way it turned out.
Supplies:
-A piece of heavy cardboard for making template
-Fabric
-Hot glue gun
-Ribbon
-Sharp scissors

Centerpieces

I know I keep saying all the projects were simple and super easy to make but they really were! The centerpieces were no exception. First, I enlarged, printed, and fussy cut (a scrapbook term used for free hand cutting) VHC images on glossy cardstock. I then had my sweetie cut wooden dowel sticks in half and I painted them green with acrylic paint. I hot glued the VHC images to the tops of the dowel sticks and set them aside. Next, I designed a circle on PSE that measured 3.5 inches and typed "Makena is turning one" and cut them out using my handy dandy circle punch. Luckily, I had left over white metal buckets from my sister's baby shower that I was able to reuse. I glued the circles to the front of the buckets using mod podge. I just love that stuff! Inside the buckets I hot glued a half dome of styrofoam to the bottoms and then placed the green dowesl in the middle of it so that it would stand straight up. Lastly, I took colored tissue paper and stuffed it in the bucket. Super easy. Super cute!
Supplies:
-Enlarged VHC images
-Wooden dowel sticks cut in half
-Acrylic paint
-Party circles either typed or handwritten
-Circle punch
-Buckets
-Hot glue gun
-Mod podge
-Colored tissue paper

The Guess Book
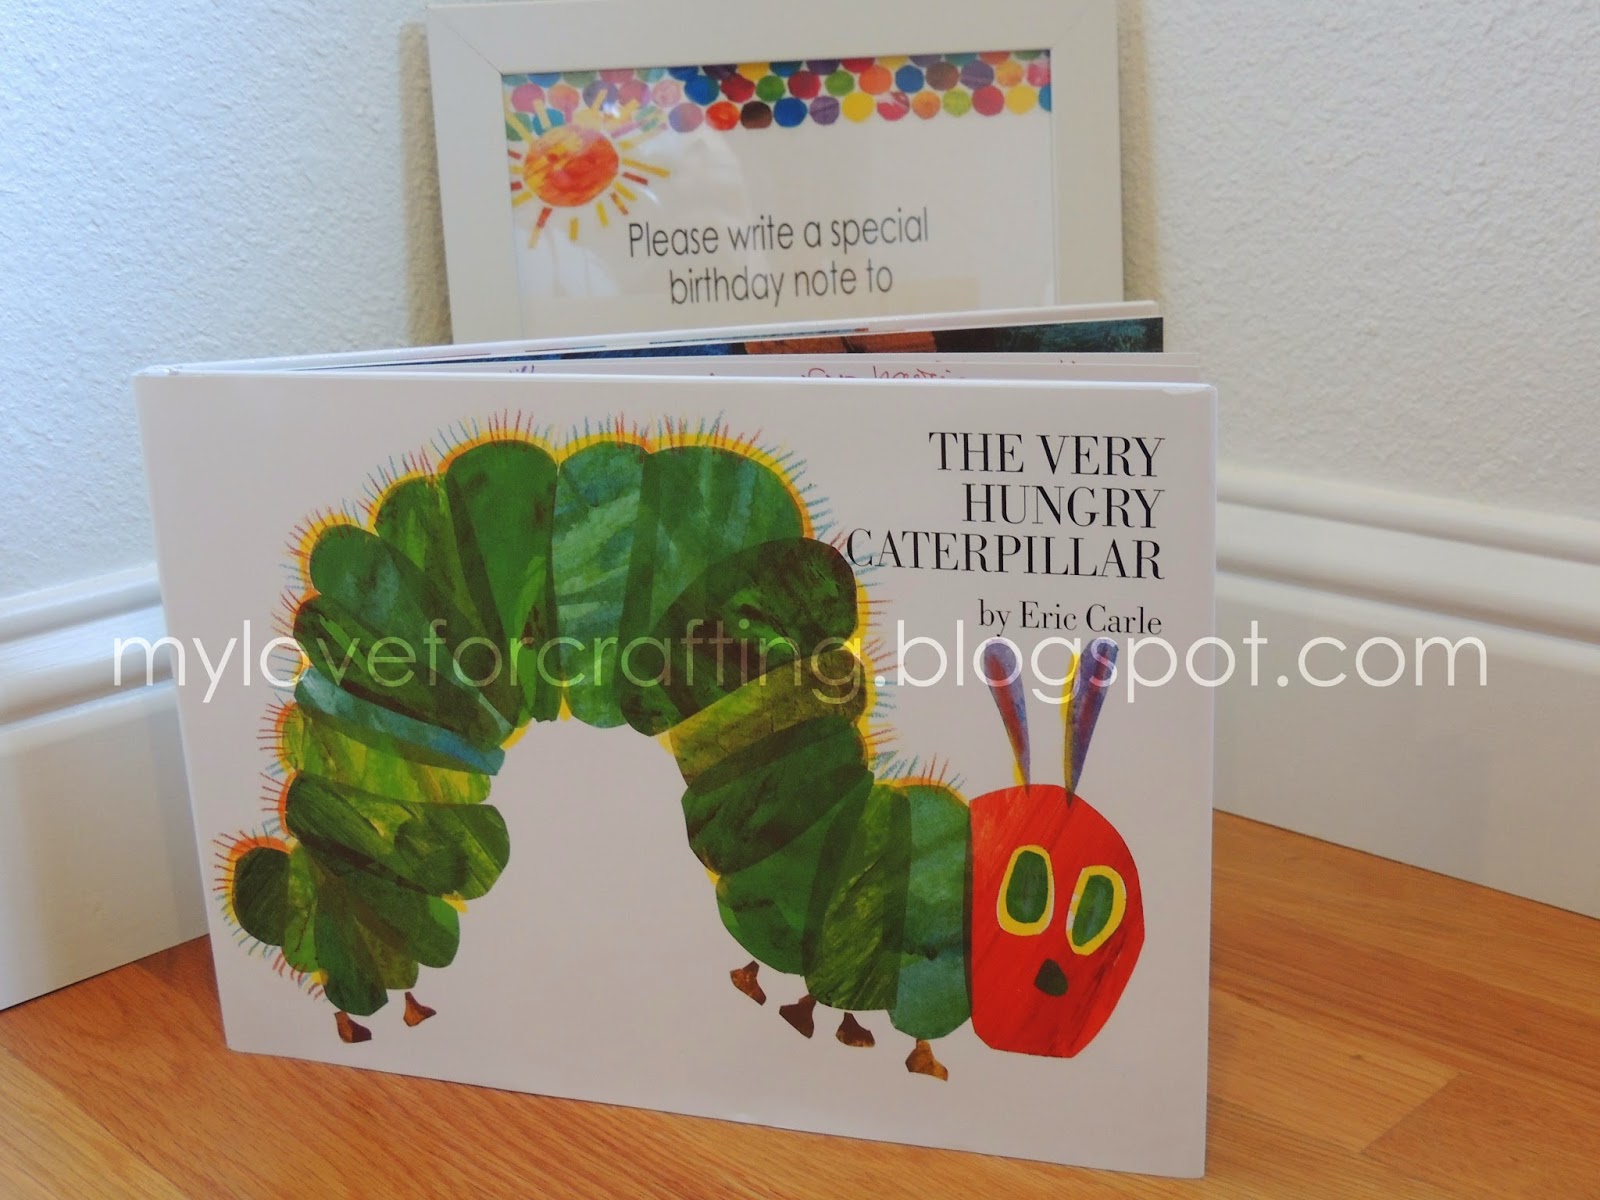
Since the party theme was inspired by a book I thought it would be cool to have everyone write a special message to Makena in the actual VHC book. Next to the book I made a simple sign explaining to the guest what I would like them to do. I absolutely loved this idea. I love that Makena will be able to look back on it one day and read all the sweet birthday wishes written to her on her special day!
Supplies:
-The Very Hungry Caterpillar Book
-Pens ( I like to use Sharpie pens)
-Typed or handwritten message with directions for guest

That's all I have to share with you today folks! I hope you enjoyed all the projects and will stop by soon to share more crafty things with all of you!
Abrazos,
Nathalie